Admin
Creating Accounts
The following examples assume you have Greenlight installed in the ~/greenlight directory. Before running the commands, change into the ~/greenlight directory.
cd ~/greenlight
Creating a User Account
To create an User account with specified values, in the Greenlight directory, run the following command:
docker exec greenlight-v2 bundle exec rake user:create["name","email","password","user"]
Once the command has finished it will print the account’s email and password.
Creating an Administrator Account
To create an Administrator account with the default values, in the Greenlight directory, run the following command:
docker exec greenlight-v2 bundle exec rake admin:create
If you would like to configure the name, email, or password of the Administrator account, replace the previous command with this:
docker exec greenlight-v2 bundle exec rake user:create["name","email","password","admin"]
Once the command has finished it will print the account’s email and password.
Removing Rooms from Users Who Can’t Create Rooms
Prior to version 2.6, rooms where created for all users, regardless of whether they were able to access that room or not.
After version 2.6, rooms are only created for users that have the “Can create rooms” permission enabled on the role that they are given.
To clean up the unaccessible rooms for users that were created before 2.6, a rake task can be used. For this rake task there are 2 options:
1- Delete only rooms that have never been used. This is the safer option to avoid accidentally deleting a room that has been used before (and may have recordings)
docker exec greenlight-v2 bundle exec rake room:remove
2- Delete all rooms for users without the “Can create rooms” permission regardless of whether they have been used or not
docker exec greenlight-v2 bundle exec rake room:remove["true"]
Updating the Security of Rooms
Prior to version 2.7, rooms were created with a unique id containing 3 sections of 3 characters (ex exa-a1b-cd2). Starting in 2.7, all new rooms will now contain 4 sections of 3 characters to increase room security (ex exa-a1b-cd2-3ef). Since this only applies to new rooms, old rooms will still have the old 3 sections format.
If you want to generate new, secure, 4 section room ids for all rooms, you can run the rake task below to do so. Please note that this will invalidate all previous links to rooms and will generate new, more secure links.
docker exec greenlight-v2 bundle exec rake room:four
Administrator Panel
Greenlight has an administrator account that gives you the ability to manage users on the server.
Accessing the Administrator Panel
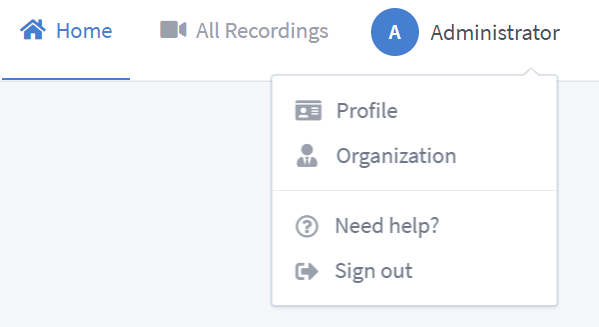
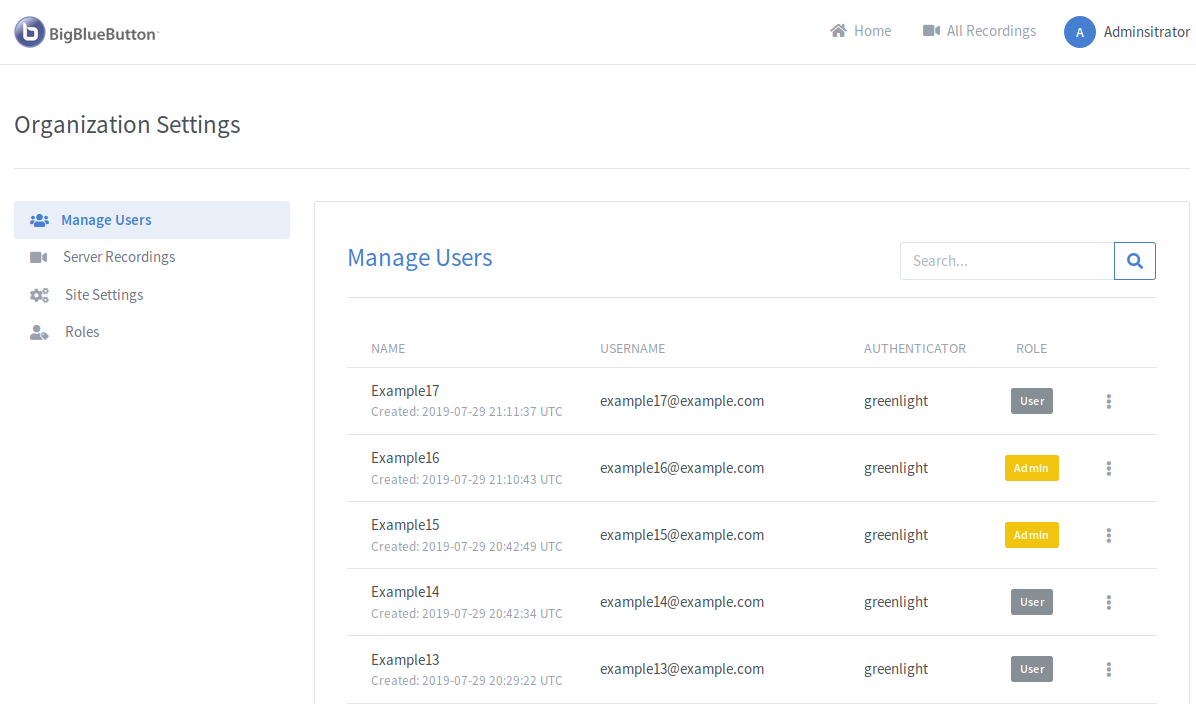
Once you are logged in as an Administrator, you will notice a new item in the Account Dropdown titled Organization.
Managing Users
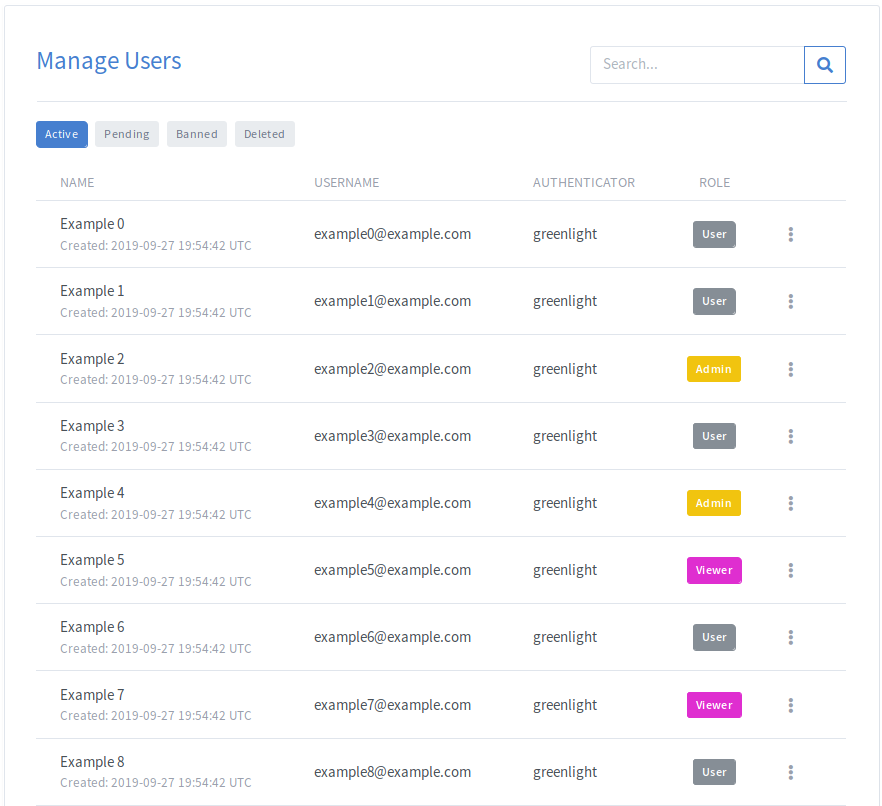
Through the Manage Users tab, Administrators are able to view and search for all user accounts that have been created.
Administrators are also able to edit each account by clicking on the vertical ellipsis.
Tabs
To switch between tabs, click on the tab that you want to switch to.

| Tab | Description |
|---|---|
| Active | Users that are able to access the application using their account |
| Pending | Users that are awaiting approval to join the application |
| Banned | Users that have been denied or banned |
| Deleted | Users whose account has been deleted by an administrator |
Search and Filter
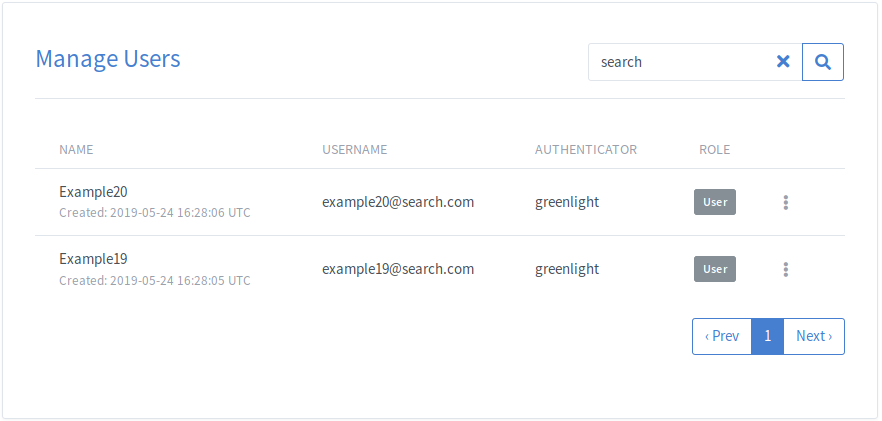
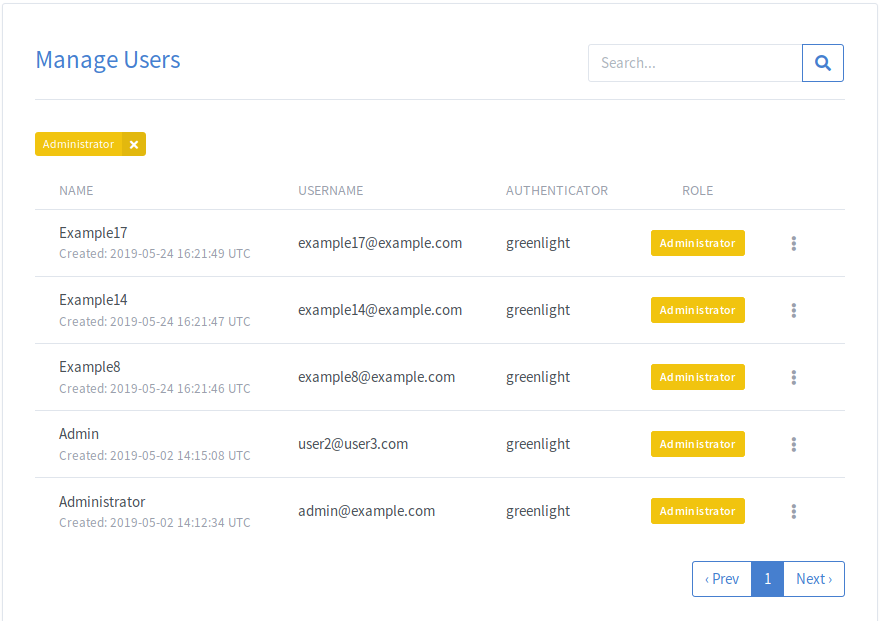
The search box can be used to filter based on the Name, Username, Authenticator or Creation Date of any user.
To filter by the Role, click on any of the Role buttons under the Role Column. This will filter the list to show only the users with the clicked Role.
Deleting Accounts
To delete an account, select Delete from the Account Dropdown.
Once an account gets deleted, the user will be moved to the Deleted tab.

From the Deleted tab, an administrator can then either recover the user’s account and their associated rooms, or permanently delete the user. If a user is permanently deleted, it will NOT be possible to recover the account.
NOTE: Permanently deleted users can resignup using the same email address of the account that was deleted.
Banning Accounts
To ban an account, select Ban User from the account dropdown.
Once an account gets banned, the user will be moved to the Banned tab.
This will remove the account from Greenlight and will also prevent the user from signing up using the same email to Greenlight in the future.
Merging User Accounts
In the case where 2 accounts need to be merged, there is a Merge action in the Account Dropdown. When merging 2 accounts together, there is a Account to be Merged and a Primary Account.
During the merge process, the Account to be Merged’s rooms will be transferred to the Primary Account. Once the transfer is complete, the Account to be Merged will be permanently deleted. No other data is transferred to the Primary Account.
To merge a user, click the Merge action in the Account Dropdown for the user that will be the Primary Account. Once the modal appears, you can use the dropdown to search for the Account to be Merged. Note that you can search by name or email in the dropdown.
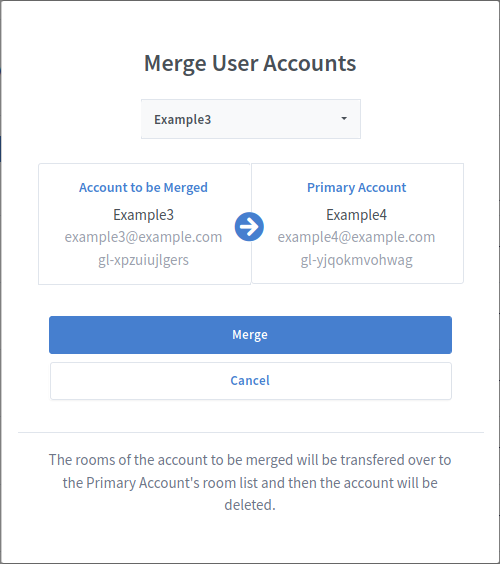
In the above example, if Example3 had 2 rooms, “Home Room” and “Room 1”, they will appear in Example4’s room list as “(Merged) Home Room” and “(Merged) Room 1”. Example4 is free to rename, delete or make any changes to these rooms.
Editing Accounts
To edit an account, select Edit for the specified user. This will open the edit user view.
From the edit user view, Administrators are able to edit the name, email, roles, default language, and profile picture for the given account.
Editing Roles
To edit the role for an account, select Edit for the specified user. This will open the edit user view.
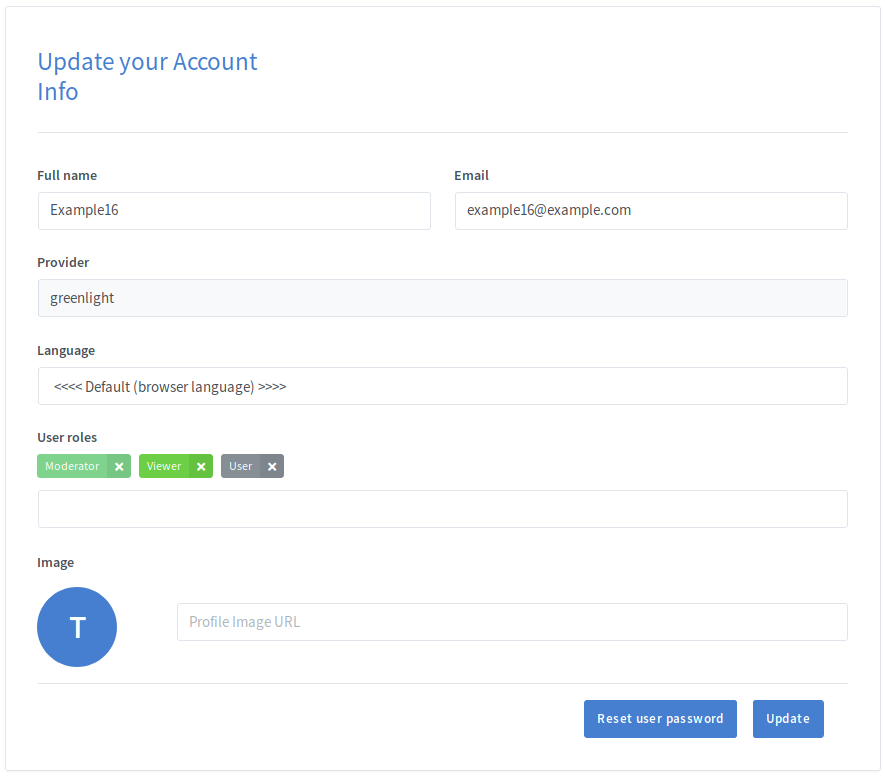
From the edit user view, Administrators are able to assign and remove roles for the given account. To remove a role click the x beside the role. To add a role select the role from the roles dropdown beneath the role tags.
NOTE: Administrators are only able to add or removes roles which have a lower priority than their highest priority role.
NOTE: While a user may be assigned multiple roles only the role with the highest priority will be used for determining a user’s permissions
Resetting User Passwords
If the user has forgotten their password, the Administrator can send them an email that they can use to reset their password.
To reset a user’s password, select Edit for the specified user. This will open the edit user view. From there, the Administrator just needs to click the Reset user password button and an email will be sent out to the user with the required instructions.
Server Rooms
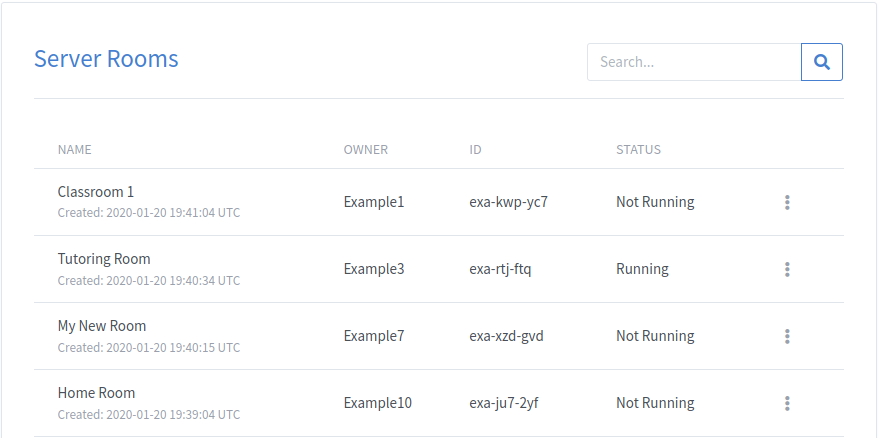
Through the Server Rooms tab, Administrators are able to view all of the Greenlight rooms that have been created.
Options
As an administrator, there are a variety of options available to you with regards to interacting with a user’s room. You can view all options by clicking the Room Dropdown.
| Tab | Description |
|---|---|
| View | Allows the administrator to join the room in the same way that any other user joins the room. |
| Start | Allows the administrator to manually start and join the room, even if it is not already running. |
| Room Settings | Allows the administrator to make changes to the room settings. |
| Delete | Allows the administrator to manually delete an unwanted room. Home Rooms can not be deleted |

Search
The search box can be used to filter based on the Name, Owner, or Id of any room.
Sort
It is possible to sort rooms by metrics such as Name, Owner, or Id.
This can be done by clicking on the headers of the table (cycles through ascending, descending, and no particular order):
Server Recordings
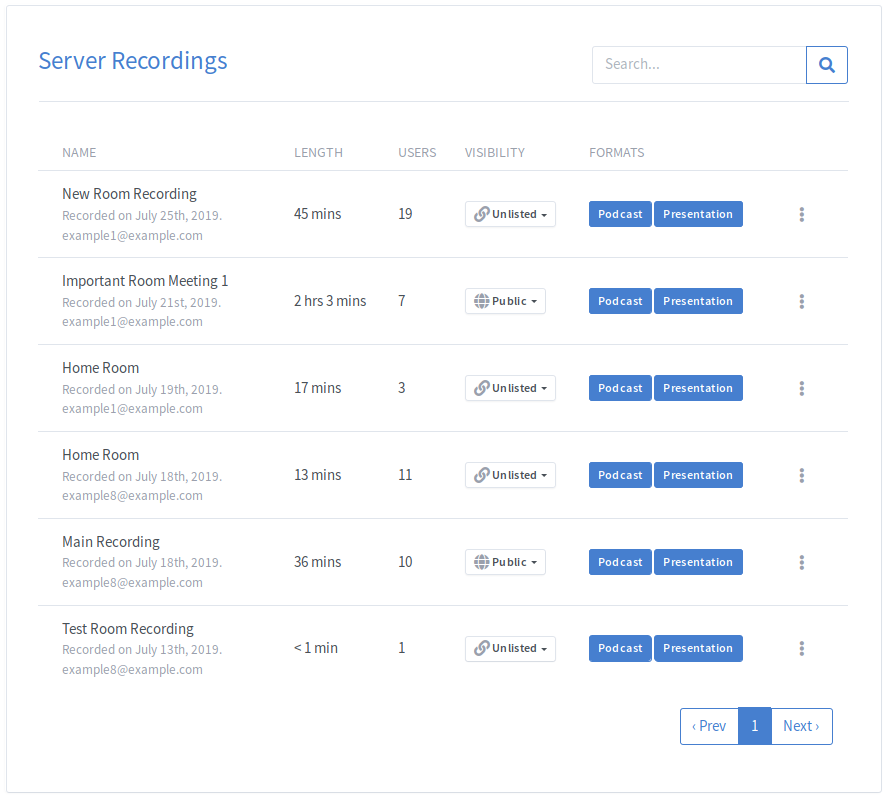
Through the Server Recordings tab, Administrators are able to view all of the recordings that exist on their BigBlueButton server.
NOTE: Due to limitations on the BigBlueButton API, if your server has many rooms or recordings, the page may not load due to the request timing out.
Search
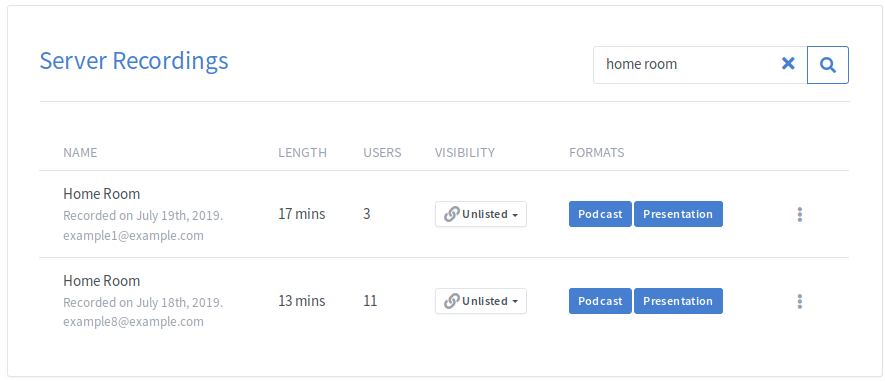
The search box can be used to filter based on the Name, Length, Users, Recording Owner, Visibility or Format of any user.
Sort
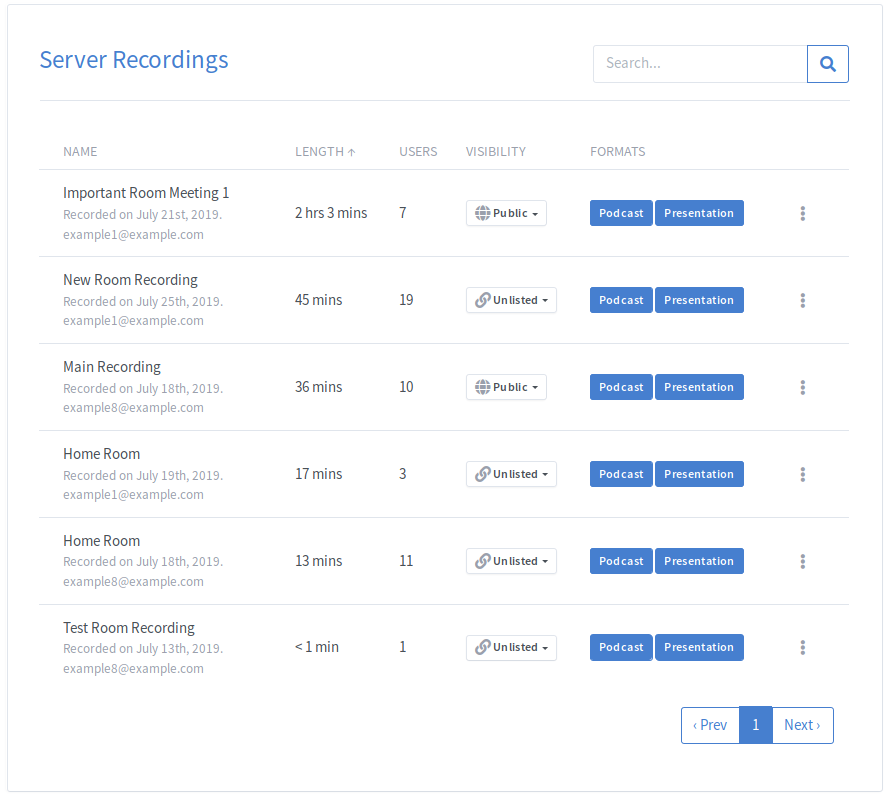
By default, rooms that are running will be displayed at the top of the list first. If no rooms are running, the rooms will be sorted by creation date.
It is possible to sort recordings by metrics such as Name, User Number, and Length of Recording.
This can be done by clicking on the headers of the table (cycles through ascending, descending, and no particular order):
Site Settings
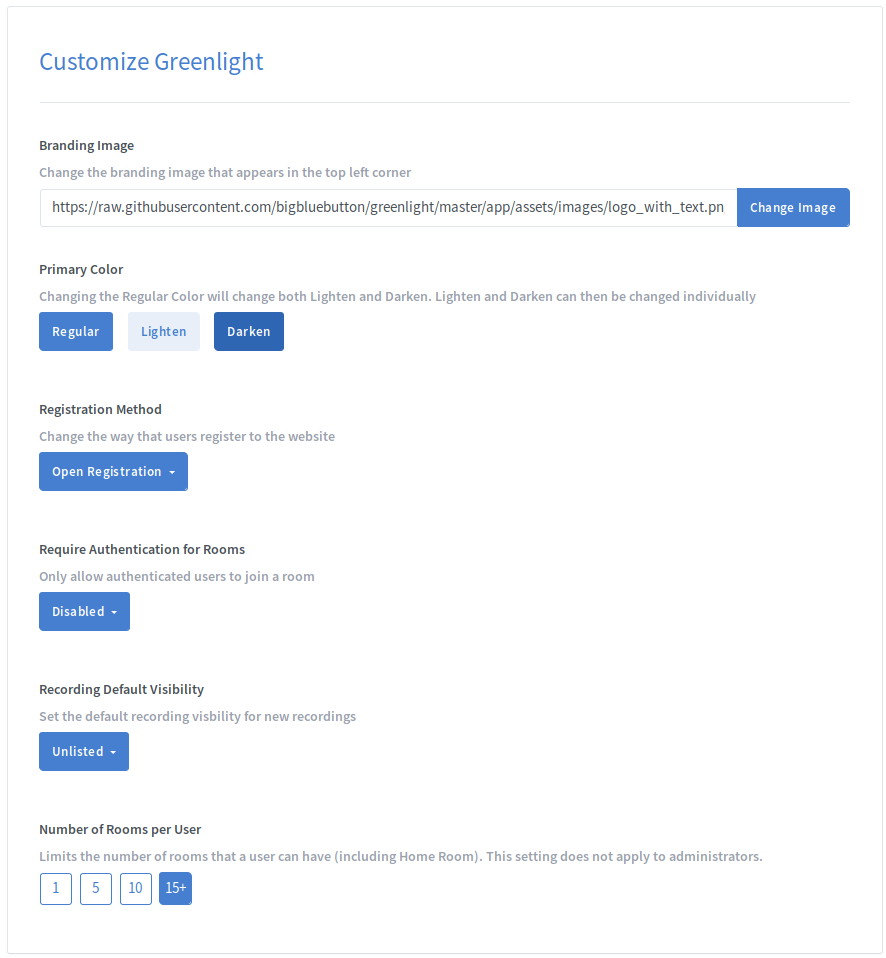
Administrators are able to customize Greenlight through the Site Settings Tab.
Change the Branding Image
To change Greenlight’s Branding Image which is displayed in the top left corner, replace the default image with a URL of your image and click Change Image.

Change the Legal Url
To change Greenlight’s Legal Url which is displayed in the footer, add the desired URL to the field and click Change Url. Setting it to blank will remove the link from the footer.

Change the Privacy Policy Url
To change Greenlight’s Privacy Policy Url which is displayed in the footer, add the desired URL to the field and click Change Url. Setting it to blank will remove the link from the footer.

Change the Primary Colour
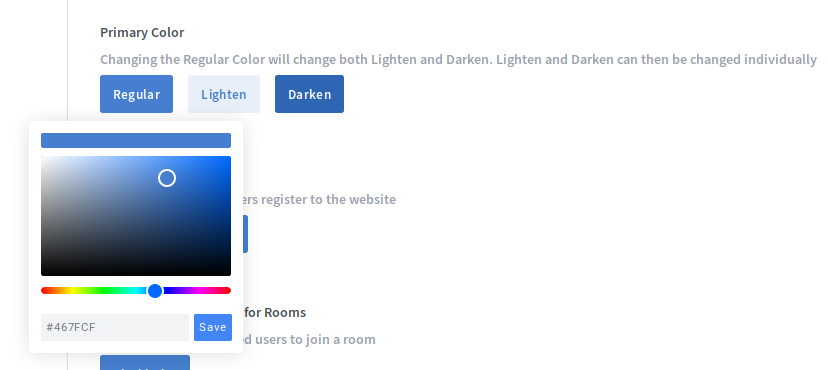
To change Greenlight’s Primary Colour open the colour palette and select a new Primary Colour.
Changing the “Regular” Primary Colour will also automatically calculate the Lighten and Darken versions of the color.
If you would like to change the Lighten or Darken version, they can be individually changed to any colour possible.
The Primary Colour is the colour that Greenlight uses as a basis for the styling. This includes buttons, links, icons, etc.
Registration Methods
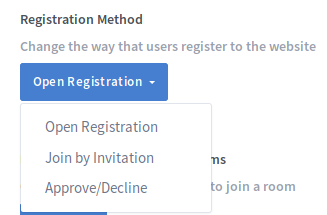
Through the Site Settings, you can configure the Registration Method for Greenlight.
Open Registration
Open Registration allows any user to sign up and sign in to Greenlight.
Join by Invitation
Join by Invitation disables the open sign up. Users will only be able to sign up if they have received an invitation from an Administrator.
To use Join by Invitation, ALLOW_MAIL_NOTIFICATIONS must be set to true in the .env file.
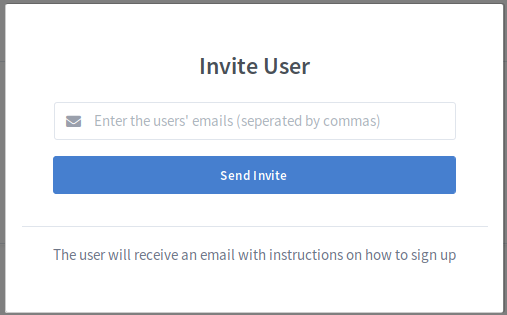
To invite a user, click in the Invite User button that is beside the Search Bar.

To send an email to multiple users, enter their emails separated by a comma. If you would like to invite only 1 user, enter their email with no commas.
The user(s) will receive an email with a button that will link them to the sign up page.
Approve/Decline
Approve/Decline allows anyone to sign up for Greenlight, but that user must be Approved inorder for them to access the features available through Greenlight.
When a user signs up, they will be set to a Pending state. The Administrator will be able be able to view all Pending users in the Pending tab in the Manage Users table.
If ALLOW_MAIL_NOTIFICATIONS is set to true in the .env file, then all Administrators will receive an email when a user signs up.

Users can either be Approved or Declined by clicking on the Account Dropdown.
If ALLOW_MAIL_NOTIFICATIONS is set to true in the .env file, the user will receive an email informing them that their account has been approved.

If a user sign up is declined, they will be set to the Banned state. A banned user can not sign in or access any of the features in Greenlight.

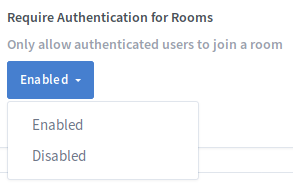
Require Authentication to Join
By default, users that are not signed in can join any Room that has been started by the Room Owner if they are given the invitation link. This can be disabled, meaning that only users that are signed in will be allowed to join a Room.
Allow Users to Share Rooms
By default, all users that are able to create rooms are able to share rooms. Shared rooms can be entirely disabled by setting this setting to Disabled.
In the Shared Access modal, users can share the room with another user by searching for that user’s name or uid. If you do not want a specific role to be searchable in this dropdown, you can hide them from the list in the Roles Permissions.

Allow Users to Preupload Presentations
By default, users will not be able to preupload presentations to their rooms. Administrators can enable or disable this feature based on their use cases.

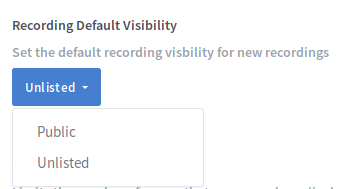
Recording Default Visibility
Sets the default visibility of room recordings.
Public: everyone can view it if they have the room link.
Unlisted: only users who have the recording link can view it.
Require Room Owner and Joiner Consent to Recording
By default, some information in all rooms is stored on the BigBlueButton server. In some cases (such as places where GDPR is present), users must consent to this before the BigBlueButton server can store information. If this applies to your deployment, set this to Enabled. Once set to enabled, it will also unlock a new Room Configuration option which will allow you to set how you would like the new Allow room to be recorded room setting to behave (Always Enabled, Optional, Disabled)

If enabled, upon joining a room, users must click the checkbox before being allowed to enter the room.

Number of Rooms per User
By default, users are allowed to create and manage as many rooms as they like. Using this setting, an Administrator can limit the number of rooms that the user can create. If the user is already above the limit and the setting is changed, the user will not be able to start any sessions for the rooms that are above the limit.
To allow the users to create as many rooms as they would like, select the option furthest to the right (15+).

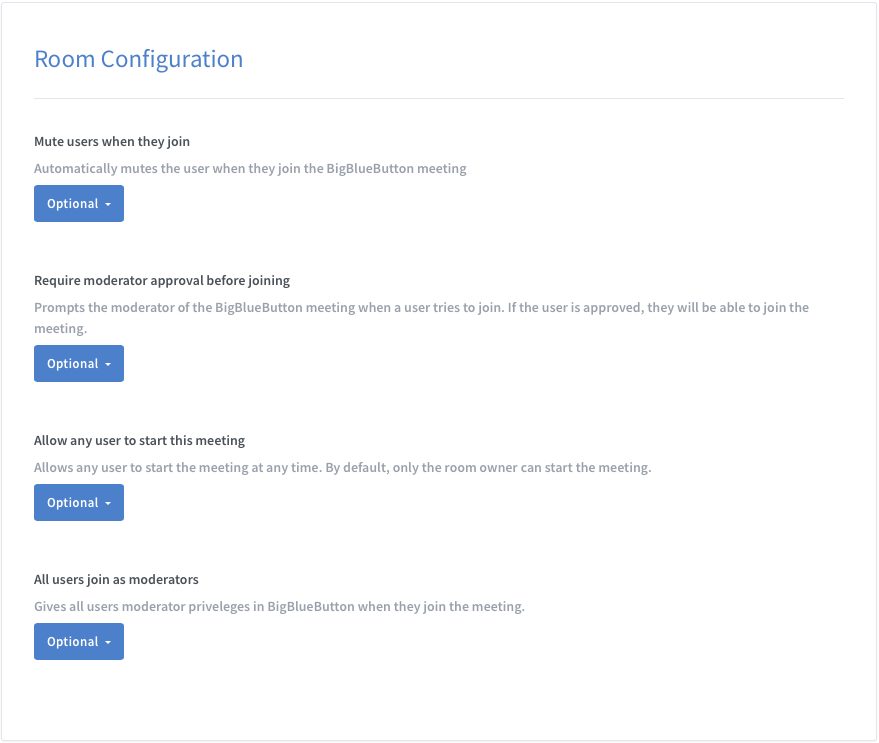
Room Configuration
Through the Room Configuration tab Administrators are able to edit room settings for their site. For currently enabled room settings, users are allowed to edit room settings as they like (defaulted to Optional). However, if a room feature was removed through the .env file, it is defaulted to Disabled.
Note: Room setting changes will not apply to currently running/active meetings.
For each room setting, there are 3 options.
Always Enabled: Setting is forced on for all rooms. Room owners can not disable this setting.
Optional: Room owner has the option to either enable or disable the setting.
Disabled: Room setting does not appear when creating a room. Room owners can not enable this setting.
User Roles
Through the Roles tab Administrators are able to edit the roles for their site.
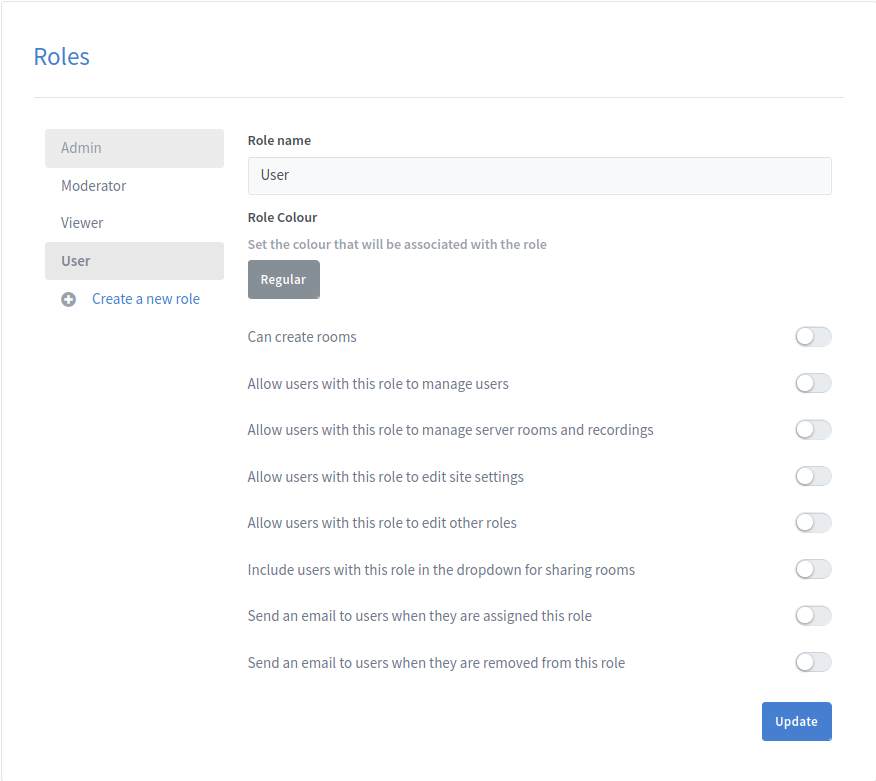
A role’s position in the roles list denotes its priority. The higher up on the list the higher the priority of the role.
Creating a New Role
To create a new role click on the Create a new role button. This will open the create role pop-up where Administrators can specify the new role’s name.
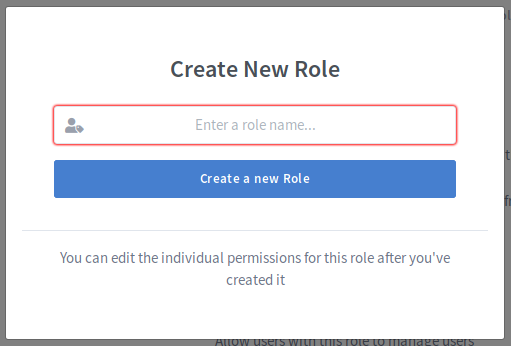
The new role will automatically be created with the second lowest priority only higher than the user role.
Changing a Role’s Priority
To change an existing role’s priority drag the role to the position you desire in the list of roles.
Note: Administrators are only able to change the priority of roles which have a lower priority than their own.
Note: The Admin role must always be the highest priority role and the user role must always be the lowest priority role.
Editing an Existing Role
To edit the permissions for a role select the role from the list of roles.
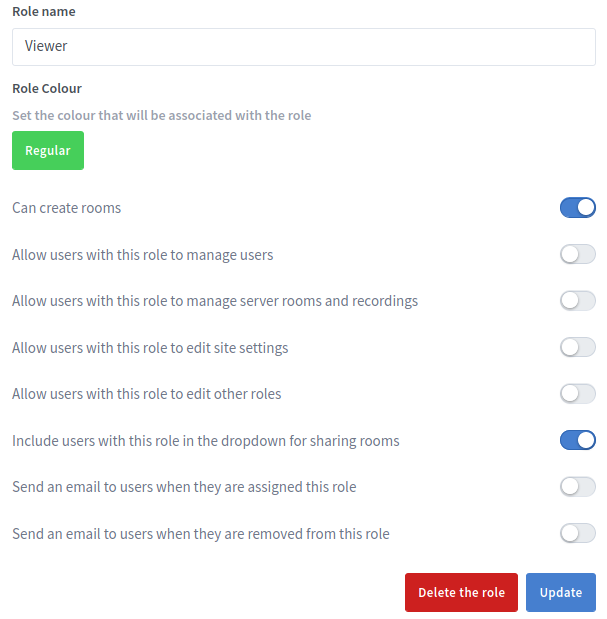
Once the administrator has selected the role they are able to update the name for the role as well as the colour associated with the role.
Administrators are also able to update the permissions for the role. The following section describes what each permission does
| Permission | Description |
|---|---|
| Can create rooms | This determines whether or not users with this role are able to create their own Greenlight rooms. |
| Allow users with this role to manage other users | This allows users to access the Manage Users tab as if they were administrators |
| Allow users with this role to view server rooms and recordings | This allows users to access the Site Setting tabs as if they were administrators |
| Allow users with this role to edit site settings | This allows users to access the Site Setting tabs as if they were administrators |
| Allow users with this role to edit other roles | This allows users to access the Roles tab as if they were administrators |
| Include users with this role in the dropdown for sharing rooms | This includes the user in the dropdown for sharing rooms |
| Send an email to users when they are assigned this role | This determines whether or not to send an email to users when they are promoted to this role |
| Send an email to users when they are removed from this role | This determines whether or not to send an email to users when they are removed from this role |
Note: Administrators are unable to change the name for the user role or any of the permissions associated with the Admin role. Administrators are also only able to edit the permissions for roles with a lower priority than their own role.
Deleting a Role
To delete a role click the “Delete the role button”. For the role to be successfully deleted no users may be assigned to the role. The admin and user roles also can’t be deleted.
See also